


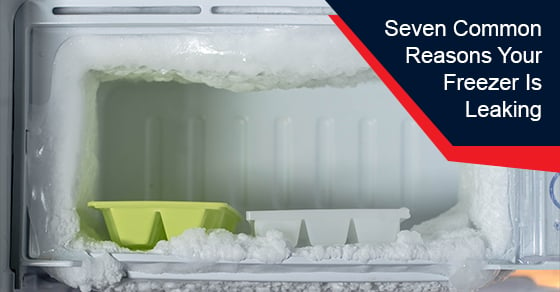
It is important to have a reliable freezer all year long that keeps food frozen and stored properly. But what happens when you discover a leak under your freezer? First off, don’t panic. Depending on the freezer’s age and temperature setting, a leaking freezer is a common occurrence that signals that something is amiss.
In most cases, when your freezer starts to leak, it’s important to contact a freezer repair service in the GTA to get a professional to check it out. Finding the primary cause of what is making your freezer leak is a challenging task. To help you out, we have rounded up seven common reasons why your freezer is leaking and what to do to locate the problem.
Locate the Main Source of the Leak
The first step to finding the solution to a leaking freezer is to defrost it. By defrosting the freezer, it can establish the main source of the leak. In some cases, some freezers might only need to be defrosted to solve the problem.
Over a long period of time, if the freezer has never been defrosted, ice can block small parts of your freezer from operating properly. Annual freezer defrosting is recommended, as it’s a good maintenance activity to prolong its lifespan.
Here are the steps on how to defrost a freezer if you find a leak. Keep in mind, depending on the thickness of the ice, you may need to attempt one to two methods or combine all of the methods of defrosting to find the source of the leak.
- The safest and simplest method takes one day or more, depending on the season and ice thickness of the freezer. Leave the freezer door open and check it every hour or two to clean up the water as it leaks.
- This step requires you to fill a ceramic bowl of hot water and place it in the freezer for 30 minutes and close the door. After half an hour, take the bowl out and clean up the water. Repeat this method until all the ice is gone.
- This step is for removing chunks of ice that are frozen in hard-to-reach corners of the freezer. You will need a spatula or hand scraper. Dab a cloth in hot water and a teaspoon of rubbing alcohol. Lay the hot cloth on the iced area. After two minutes, remove the cloth and remove the ice chunks with the scraper.
- If you want to defrost your freezer within a day, set up a box fan in front of the opened freezer. Turn on the fan on medium to high speed, and the air circulation will speed up the process with melting the ice. Check the freezer every 30 to 45 minutes to clean up the water.
- For those with a wet/dry vacuum, use the vacuum’s blowing mode to melt the ice and alternate to vacuum mode to suck up the ice water.
Related article: Why Is the Freezer Not Cold Enough and How to Repair
Check for Mould and Gaps in the Seal
Inspect the seals along the inside of the freezer door for mould. If no mould exists, check the outside and inside of the freezer door for gaps. Gaps in the seal of the freezer door mean it isn’t secured properly, and this can cause cold air to form and leak from the inside.
The cold air that escapes through the freezer door gaps can potentially cause mould to grow on food. Gaps in the seal cause the internal freezer temperature to drop and melt the ice, causing the freezer to leak. If you do detect gaps in the seal, the solution is to have the gasket replaced.
Check the Freezer Drain Hose
When the freezer drain hose malfunctions, it can cause the freezer to leak. The only time when a freezer should be draining is when it’s on defrost mode. If you observe that your freezer is draining during normal cycles, there is a problem with it and you should contact an appliance repair professional to fix it.
Check the Drip Pan
When a freezer defrosts, the water flows to the drip pan. If you have never checked it, now is the time to make sure the drip pan at the bottom of the freezer hasn’t gotten full. If the drip pan is full, it will overflow and leak. You need to remove it and dispose of the water. After putting the empty drip pan back into the freezer, if it fills up before the next defrost cycle, you should call a professional for freezer repairs.
Check the Drain Hose and Coupler
Besides the drip pan, check the drain hose and coupler to make sure they haven’t gotten loose or detached. If the drain hose and coupler have cracked or split, this is the main culprit of the leak, and they need to be replaced.
Check for a Blocked Drain Line
Sometimes, it’s not something inside the freezer that is causing it to leak, but the pipeline through which the freezer drains getting clogged up with dirt and debris caused by defrosting. Check to see if the drain line is blocked by running water through it. If water does not come out the other end, that means it’s blocked, and only a professional freezer repair specialist can replace it.
Replace the Thermostat
Last but not least, if the freezer is more than ten years old, it might be possible that the thermostat is malfunctioning and needs to be replaced. Check to see that the thermostat is sitting at the correct temperature and apply the watch-and-see method. If the freezer continues to melt, leak, then refreeze, it’s time to get it replaced by a freezer repair technician.
Now that you know the seven common reasons your freezer is leaking, you should be able to do your troubleshooting and, hopefully, solve the problem with a few freezer part replacements. However, if you have replaced the thermostat, drip pan, and drain hose and it’s still leaking, it’s time for one of our professional technicians at Prime Appliance Repairs to take a look and see what solutions can be applied.
To order request service for our freezer repairs in Toronto and the GTA, call Prime Appliance Repairs at 647-952-1517 or contact us here.